Learn how an make herbal salve with Oshala’s Salve Maker’s Kit!
When you make your first herbal salve, you will fall in love with the smell of melting beeswax and the high quality herbal oils of Oshala Farm; the smooth feeling of the oils and wax together; the beautiful way the finished product hardens into a perfect flat surface in the jar…it feels luxurious and simple both at the same time.
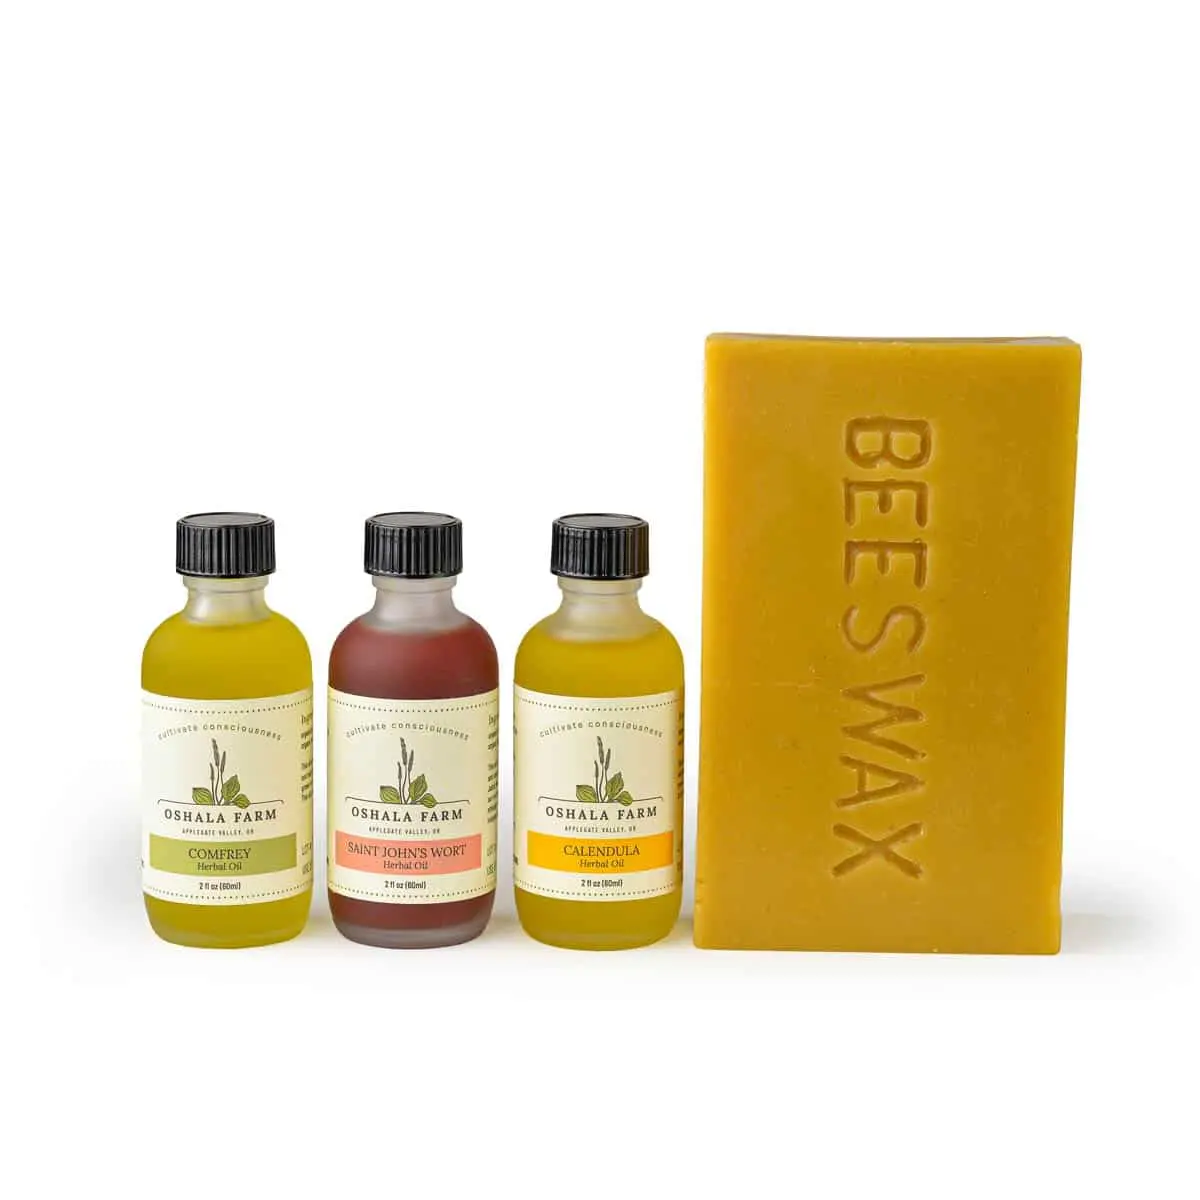
If you are new to salve making, Oshala’s Salve Maker’s Kit is a great way to get started. It includes 2-ounce bottles each of Oshala’s amazing organic infused oils: St. John’s Wort, Calendula, and Comfrey, plus two blocks of local beeswax from hives near the farm.
Basically, a salve is just herb-infused oils combined with beeswax. The wax solidifies the oil so it stays firm and makes for a less greasy application than a straight oil. Depending on the herbs you used in your oils, you can create salves for pain, skin healing, burns, inflammation, sprains and strains, infections, and the list goes on and on!
Oshala Salve Maker’s Kit Recipe:
Total yield: 7 ounces of multi-purpose herbal salve
- All six ounces of infused oils
- 1 ounce of beeswax
- Optional: essential oils
- Double boiler OR a pot and a glass measuring cup
- Old cheese grater or a heavy cleaver
- Kitchen scale
- A few metal spoons
- Jars with lids
- Disposable rags or paper towels
1. First, fill your pot about halfway with water, and put it on the stove on medium-low heat.
2. Put a couple of metal spoons in the freezer. We’ll tell you why later!

3. Grate beeswax and weigh out one ounce on your kitchen scale. We have found that buying an old grater from a thrift store and reserving it just for grating wax works well, as it is almost impossible to clean all the wax off! If you are using a cleaver, carefully chop/shave off small chunks of wax.
4. Add MOST of the wax to the double boiler, reserving an eighth or so. If you don’t have a double boiler, you can set your glass measuring cup in the heating water and pour your oils into the measuring cup. Be mindful not to allow any water to splash into your oils. Stir occasionally with your room temperature spoon. While the wax is melting, neatly arrange your jars in a line and/or close together with the lids off. This will make the pouring easier!
5. Pour all six ounces of oil into the melted wax, mixing occasionally. It will look like scrambled eggs. You might be tempted to increase the heat, but keep it on medium-low to preserve the medicinal properties of your oils.
6. Once the wax has fully incorporated into the oil, take one of your your cold spoon from the freezer; dip it and immediately remove it from your mixture. The salve that is hardened on the spoon will be the consistency of your final product. If is not firm enough for your liking, add a tiny bit more grated wax. Keep testing till it reaches the consistency that you want.
7. When the salve mixture is ready, turn the heat off. Lift out the pot or measuring cup from the water bath. Using a rag or towel, wipe off the moisture from the outside so no water will drip into your jars. Carefully pour your hot mixture into your jars. If you’re spilling a lot, you can transfer the mixture into a measuring cup with a spout for easier pouring.
8. If you want to add essential oils, now is the time while the mixture is still hot. Add 1-2 drops of essential oil into each jar, and then immediately set the lids on the jars.
9. Leave your jars undisturbed for an hour or more to let them harden.
10. Clean up! Before the salve hardens on your tools, use disposable rags to thoroughly wipe out your pots and stirring utensils before washing with soap and water. Don’t get wax in your sink, as it can clog the drain and be very difficult to clean up once it is hardened.
11. Label your jars with the name of your salve, the ingredients, and the date it was made.
12. Celebrate what you created with the help and magic of plants!!!
~ Lauren & the Oshala Farm Crew